Apply special adhesive 6 and lift the board to the installation position.
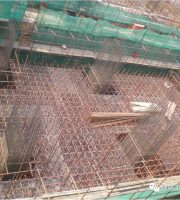
Construction of reserved structural columns with 10 slots.
Use special adhesives and repair agents with grid cloth for treatment.
After the installation of the ALC board wall is completed, the construction of the structural columns will be carried out uniformly.
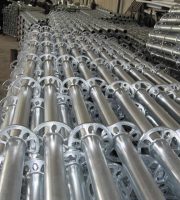
After the ALC board enters the site, material acceptance is carried out, After passing the inspection, construction shall be carried out according to the positions shown on the drawings and relevant specifications.
After the board is installed in place, treat the gaps between the boards and between the board and the top plate of the wall beam.
Installation of ALC board top fixing parts 5.
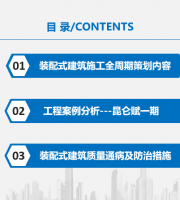
This article is based on the factory building project of the 13th Hydroelectric Bureau of China.
Ten steps! The main construction sequence of the construction process is as follows: ALC board entry → setting out the baseline → installing the fixed parts at the bottom of the ALC board → installing the fixed parts at the top of the ALC board → applying special adhesive to the joint surface between the board top and the board → lifting the board to the installation position → adjusting the verticality and flatness of the board → treating the board joints → constructing the reserved structural columns → slotting and embedding the line pipes and boxes 1.
Water and electricity slotting can only be carried out 14 days after the installation of embedded conduits and boxes.
Apply special adhesive to the joint surface between the top of the board and the board.
Use professional tools to slotting, first set out the line, and then slotting
.
After the board is lifted to the installation position, use tools such as a guiding rule and laser level to adjust the verticality and flatness of the board to meet the requirements of the specifications.
Take a look at the construction steps of using ALC lightweight partition panels for the inner wall.
Use a flat car to transport the ALC board to the installation position, and then use a simple crane to lift it to the installation position for installation.
Install the bottom fixing part of the ALC board and the top fixing part of the ALC board.
Before the construction of the ALC board, it is necessary to set out the reference line and use a laser level to mark the horizontal line.
Install the U-shaped card used to fix the ALC board at the top plate or beam in the installation position.
Construction of reserved structural columns for joint treatment 9.
If the wall length is greater than 6m, reserve the position of the structural columns according to the specifications.
Adjust the perpendicularity and flatness of the board.
Install the fixing parts at the bottom of the 3ALC board on the benchmark line and install galvanized iron sheets for fixing at the bottom of the ALC board.
Lift the board to the installation position 7, adjust the verticality and flatness of the board.
Apply special adhesive to the top plate or beam at the installation position of the board top, and also apply special adhesive between the boards or between the board and the wall.