The installation of the open ground support on the expanded ground should be determined according to the degree of soil softness.
Open expansion bolt holes on the cement roof, and the hole depth depends on the thickness of the roof; 2.
The base of the support is made of C30 concrete.
If the Owner does not use grid connection or has not approved grid connection.
Use T-type screws to pass through the beam, fix the beam on the steel plate clamp, and tighten it with nuts after adjusting the position (the same as 1, try to fix all beams at one time, if not, fix two rows at one time to facilitate the installation of photovoltaic modules).
The support of the cement flat roof can be divided into two parts: the base part of the support and the support part.
2.
When installing components on the color steel tile surface, also pay attention to connect the terminals of the two components before installing the next one.
.
Drilling pouring; 2.
The hook shall be filled with cement and waterproofed, and the tiles shall be restored.
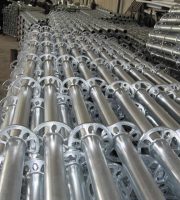
First of all, understand the common support materials: understand the shape and purpose of each component and facilitate the rapid installation of the support: cement plane or common support style of ground power station: when the wall is too high or there are obstacles on the ground (lightning strip, line pipe, bridge), the support with raised feet can be used, and the roof can also be laid in two rows when it is open: 2.
According to the site example, the fixed density of the hook of the tile roof is equivalent to that of the color steel tile, with 4 hooks fixed per square meter; 4.
Ground masonry; 4.
Example comparison of grid-connected system and off-grid system: PV system wiring 1.
Repeat steps 1-4 until the installation is completed.
Cement pier label and layout: cement pier layout: the supports produced by different manufacturers are different, and the applicable supports are different according to the specific conditions of the site.
There are several groups of positive and negative pole pins on the inverter.
5.
The components of the photovoltaic system 1.
Cement base block.
After the first photovoltaic module is placed, it is fixed with a single-side pressure block.
The installation of color steel tile roof is relatively simple, Different fasteners are equipped according to different diamond corners of the lighting tile, as shown in the figure: the fixed fasteners should be balanced horizontally and vertically, and the density should be kept at 4 per square meter.
The difference is that the ground will be a group of multiple rows of components, while the roof is mainly laid in two or single rows.
Support part 1.
Construction details of tile roof: 1.
Then our connection method is as shown in the figure: 2 When installing components on the cement flat roof, if the single-row components are relatively long, they can be installed from the middle to both sides in turn, so that the components can be installed more horizontally.
4.
The support on the ground is similar to the support on the roof.
The AC end is connected to the grid.
And fasten it with screws.
The installation of tile-inclined roof tile-inclined roof is also a dangerous construction site, so safety measures must be taken before construction.
The number of modules connected to each string according to the inverter group depends on the inverter model.
This requires us to pay attention to the number of grouping strings when connecting the components.
The steps for installing the fastener bracket and photovoltaic panel are shown in the figure: 1.
Before installing the next component, the pins of the two components should be connected.
3.
The photovoltaic system is composed of the following important parts: photovoltaic modules: photovoltaic cells are made into thin film plates and placed between the packaging layers; inverters: convert the DC power generated by the photovoltaic modules into grid-connected AC power batteries: devices for storing direct current (DC) in a chemical way Photovoltaic supports: Photovoltaic systems provide support and positioning for photovoltaic modules Example diagram: 2 The type of photovoltaic system can be divided into two types: grid-connected system: the advantage of this type of system is that it does not need batteries to store energy and is directly connected to the national grid, without worrying about power failure; Off-network system: Off-network system needs battery to store energy, so the cost is relatively high.
Generally, the power supply company is connected to the grid.
Clamp the front and back of the steel plate clamp on the color steel plate according to the position specified in the drawing, and fix them with screws (try to fix all the steel plate clamps at one time, if not, fix two rows at one time to facilitate the installation of photovoltaic components).
Drilling pile; 3.
3.
Here are some common support installation methods.
4.
If more than one group of inverters need to be connected at the same time, the DC end of each group of inverters should be connected with the module separately, and the AC end can be connected to the power grid in parallel, and the cable diameter should be correspondingly thickened.
Inject sealant into the expansion bolt hole; 3.
For example, a 4KW single inverter is equipped with 18 components and there are three groups of positive and negative pole pins on the inverter.
Component installation 1.
Series-parallel connection mode of PV system PV modules can be connected in parallel or in series as required, or in series-parallel hybrid connection.
The installation unit only needs to reserve the AC end in the electricity meter box and install the circuit breaker.
Apply sealant on the joint surface of hook and roof; 5.
The installation unit needs to connect the AC terminal to the lower end of the power inlet switch.
Put the expansion bolt and fix the hook on the cement roof; 4.
Fixing method of single-side and double-side pressing blocks: slide the T-type screws into the beam (it is better to slide all T-type screws in advance to facilitate installation), and use single-side and double-side pressing blocks to attach the PV module.
The number of components that can be paired with different types of inverters for different types of inverters is certain, and the number of components in each group can be allocated according to the number of branches of inverters, as shown in the figure: 3 The DC circuit breaker and AC circuit breaker shall be installed at the DC input end and AC output end of the inverter in the connection mode of the inverter.
When installing components on tiled roofs, the connection mode and number of strings of components should be considered in advance.
For example, four 12V PV modules are used to design a 24V off-grid system: 16 34V PV modules are used to design a grid-connected system composed of two series parts: 2.
If the user is connected to three-phase electricity, three-phase inverter is required.
Generally, there are the following ways to fix the foundation: 1.